Sunday, August 14, 2011

Hi all, it has been a while since my last post and even longer since I was able to do any work on the boat. But, I'm back and have been busy working on the catamaran in hopes to complete it this summer, at least far enough that I could give it a test sail before fall.

As you may recall, from earlier posts, I delayed the project for one summer due to planning a wedding and preparing to move. I ended up having to delay it yet another summer as the winter before that I was among the many laid off that year. Now, however, I am back to working full time and in a new garage so things can move forward.

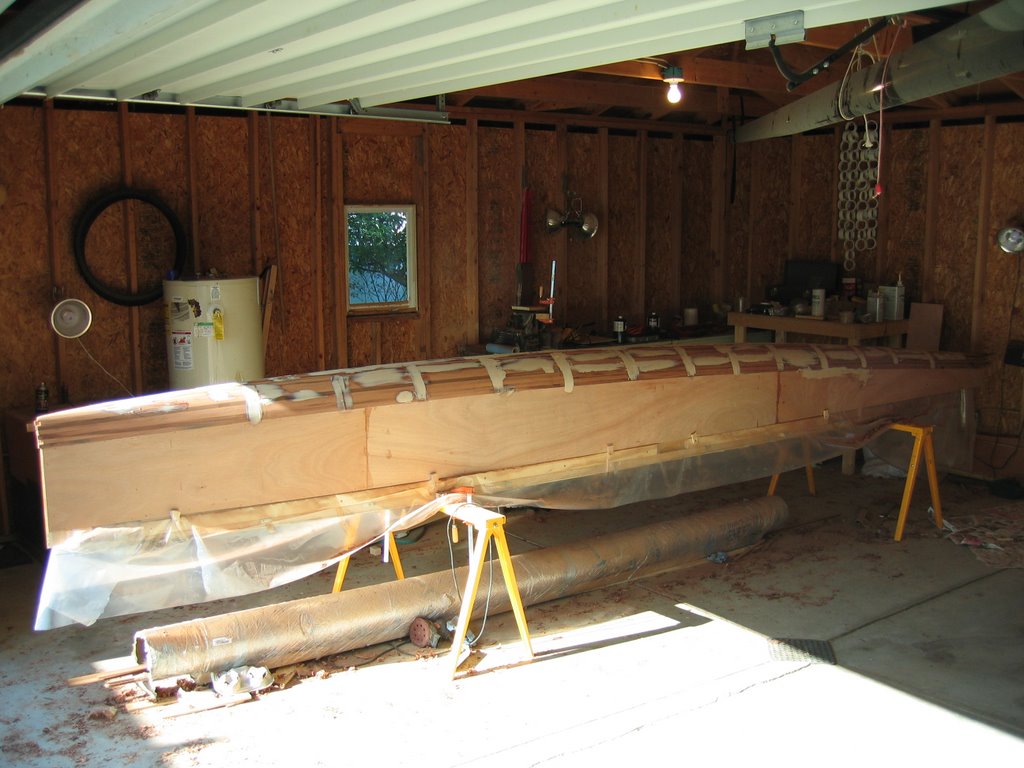
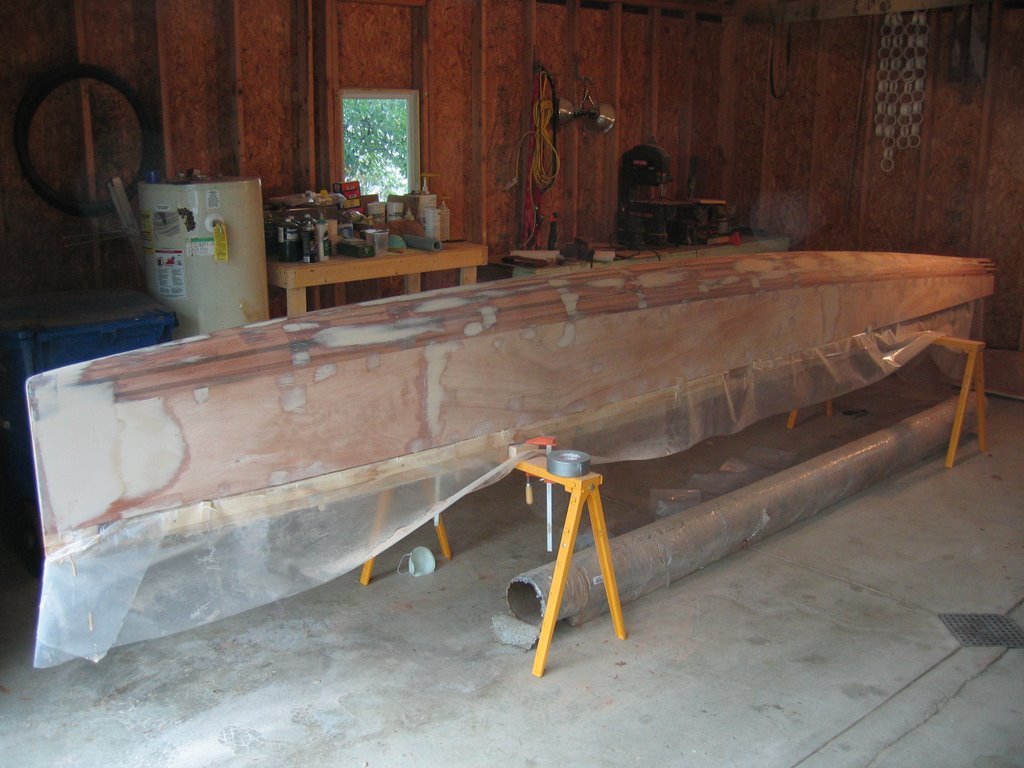
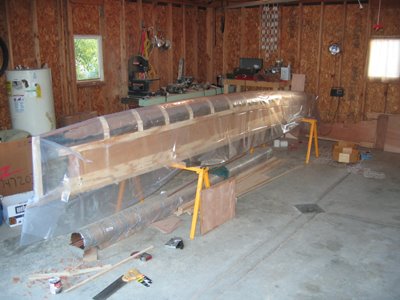
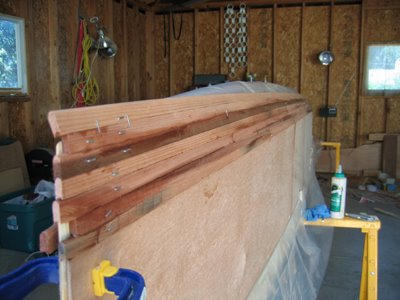
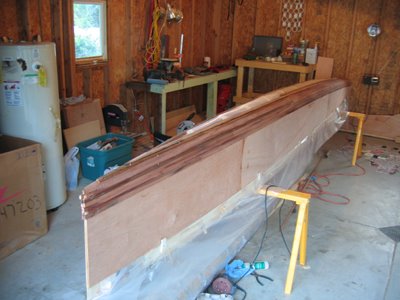
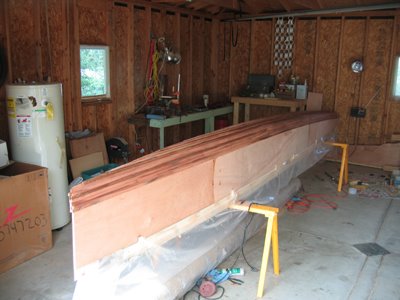
These first two photos are the completed hulls with bulkhead and substructure for support. There is a reason why they look different. When you apply fiberglass it is not initially smooth. The texture of the glass cloth needs to be filled in and sanded. The first hull was filled in with straight epoxy by applying two or three extra coats. Since the completion of that hull friends of mine had found a faster way of filling in the glass cloth. It is simply a fairing compound, or a specific powder additive added to the epoxy. This is spread over the glass and sanded. And it is a lot easier to sand then the straight epoxy coat which I discovered at the beginning of this summer.


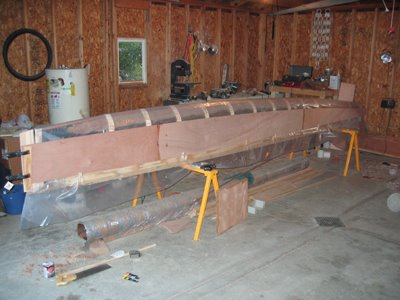
This was also the last thing I did to the hulls in my old garage prior to packing up and moving.


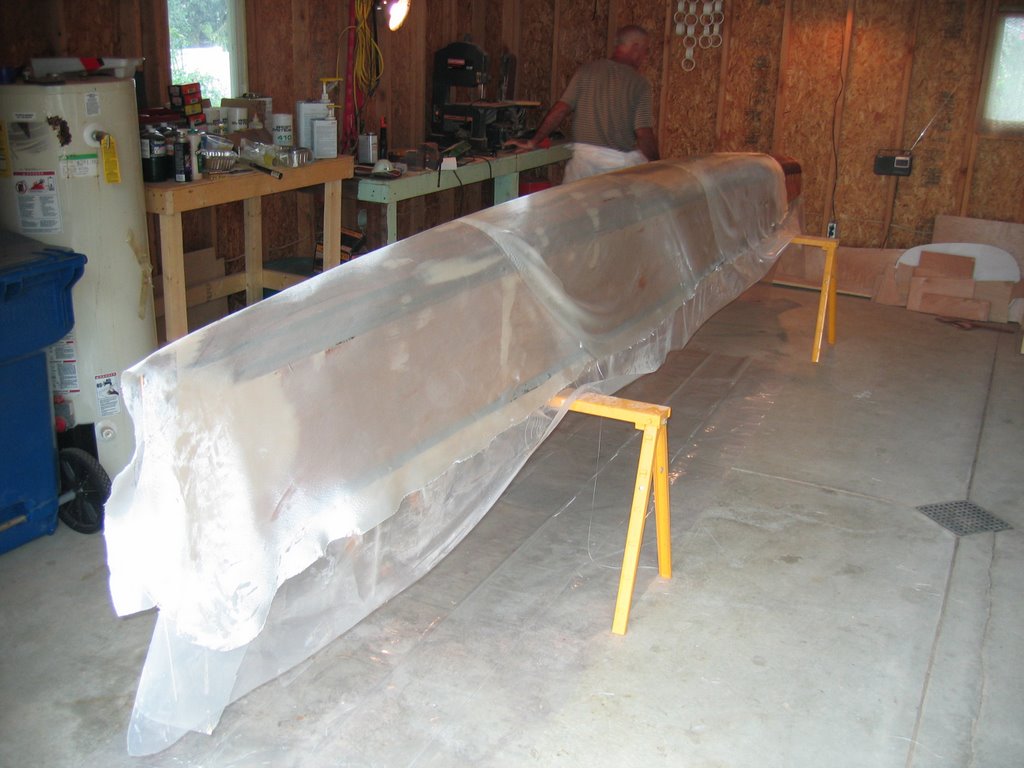
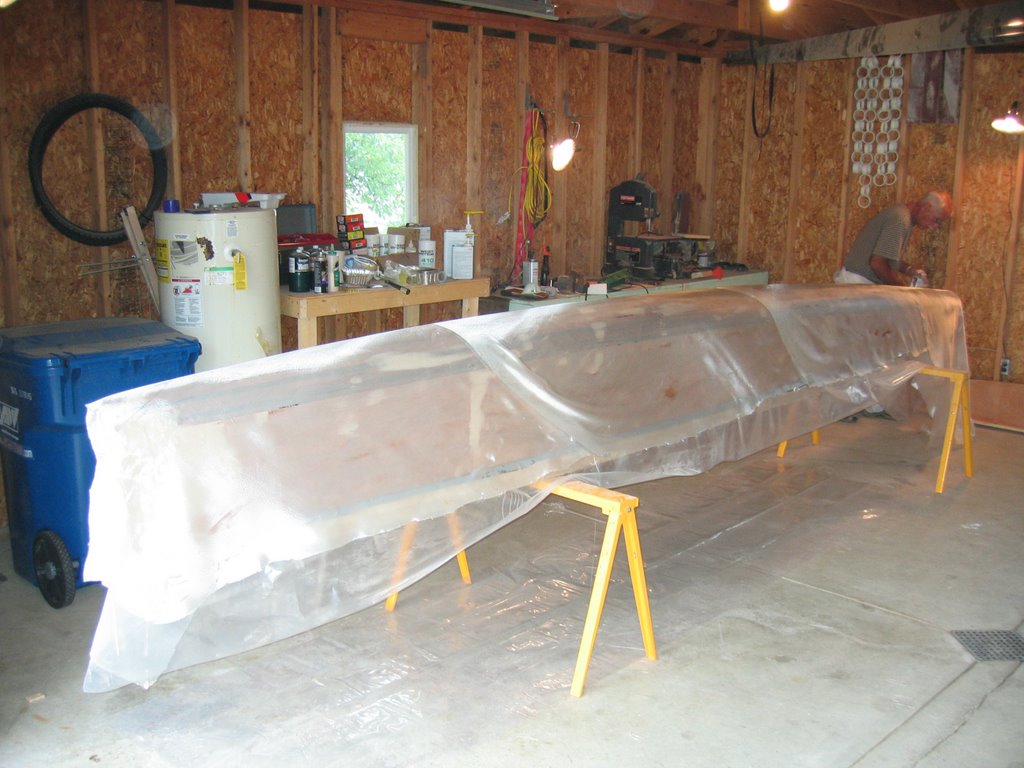
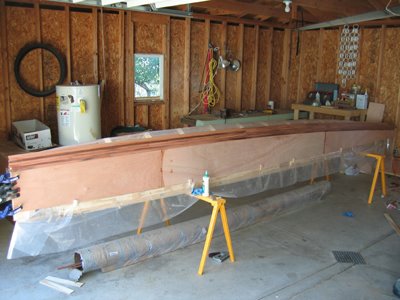
Once I began working on the hulls again, it was a matter of sanding them and getting a coat of primer on them. I wanted at least one coat of primer done while the hulls were separate - might as well when it is a bit easier, right? So I spent a good portion of two to three months sanding, and I am so glad I am done with sanding.


And yes, this is me priming the hulls.


Now on to the fun part. Joining the hulls. To join the hull I needed a holding jig to hold the hulls in alignment properly to each other. This jig is simply a frame made out of half inch plywood with a couple uprights to hold the hull. The trick with this is to make sure the jig is square so the hulls will be square.


With the jig made and squared I could set the hulls.


For the finished look, I wanted to have the cross beams set into the hull about half way. To do this I needed to cut a notch into the hull sides to receive the 3 1/2 inch diameter aluminum tubes. This allows them to set directly onto the bulkheads (the side to side vertical wall seen at the bottom of the cut).


The cross beams are set in place.


Here you can see the strip of fiberglass holding the beam to the bulkhead. Once the deck is on I will use additional strips of carbon fiber for added strength.


There are a few more internal items to take care of before putting on the deck. These include making a daggerboard box. The daggerboard is a type of keel which keeps the boat tracking straight and is inserted through a hole in the hull from the top. The daggerboard box is a sleeve which connects the deck and the bottom of the hull allowing this to happen without it leaking. For those of you who are involved with A class catamarans, I am using a pair of A3 daggerboards.


Other items include rudder heads (the bracket for mounting the rudders) and trampoline hooks. The trampoline is the material between the two hulls which I sit on while sailing. And yes it is the same material as a trampoline, just no springs.

I have been able to set the forward section of the deck however, as there is not much happening in that section of the boat. When finished the hull bottom will be painted white and the deck will be natural wood with about 3/4 inch strip of white on the edge to hide the screw holes when gluing the deck down.


So that is where I am at now. I will keep you posted a little more often as I go and hopefully will have the boat in the water this summer yet.

Saturday, September 12, 2009

Ok, its been over a year again since I've posted and this time not much work has been done. I had hoped to have the hulls assembled this year but that is not the case for two reasons. One, work has been slow and so have the pay checks. And two which is a more exciting reason is that I have been planning a wedding.

As for the hulls. I have a little shaping to do on the sheer clamps (these are 3/4 by 3/4 pieces of pine running the length of the hulls at the top and will give added surface for the deck to be glued to) and adding supports for the decking. These are minor and can actually be done after the hulls are assembled.

So... hopefully next summer after things have slowed down a bit and the paychecks more stable I will get back to building.

Wednesday, July 02, 2008

Wow! It has been over a year since I posted anything regarding the actual work on my Cat. This summer I hope to have a lot done. In fact my goal is to get the hulls assemble and be able to raise the mast. The remaining work after that can be done during the winter and be ready to sail next spring.

O.K. first thing...A month or so ago Ian Lindahl came over and helped glass the inside of the first hull. This opened the doors to a lot of progress. Once that was done I could start with the internal structure - bulkheads, sublayer, transom, forestay and shroud blocks, and sheer clamp.


The first things to build were the bulkheads. These are vertical structures that are placed where the aluminum cross beams go to connect the two hulls. These bulkheads are made from a foam sheet laminated between two pieces of 3mm okume plywood. The half round cut out at the bottom simply allows for air flow and if any water does get in I can get it out at the transom (back end) through an access point. In the forward bulkhead I cut out the center. This simply lightens the panel a bit more. They are then glued in place with thickened epoxy.


Second was to place the forestay and shroud blocks. For the non-boaters there are two cables on each hull that hold the mast up. The forward cable is the forestay and the aft cable is the shroud. The blocks are the anchoring points for the u-bolt which the cables will connect to. I decided that from the side view of the hull I wanted to have a curved deck. So to locate the forestay and shroud blocks I need to create a pattern for the curve, temporarily place my sheer clamp (the long piece of pine running the length of the boat) and below that place the blocks. The photo showing the overall view illustrates the use of clamps made from PVC pipe and the close up view shows the curve pattern, sheer clamp and then the block. The block is also bonded to the hull side using epoxy and for safe measure I glassed over it.


Third was to place the sub layers. There are two sub layers. One forward of the main bulkhead. This layer keeps the hull from collapsing in the event I pitchpull - basically flipping end over end - This link has a few images of boats pitchpulling. http://www.mathran.nl/acat/node/17. The second layer is between the main bulkhead and the aft bulkhead and will keep the hull from collapsing as I fly a hull. When I do that I will be literally standing on the side of the hull (Oh...I can't wait!). You can see an example of Ian flying a hull in the video posted in the last update. So.. These layers are both made from standard 2" pink insulation foam cut to shape and then spot glued in place. These will also help keep the shape of the hull when I start laying up the deck.

So Next is to assemble the sheer clamp. This is a 3/4 x 3/4 strip of pine running the length of the hull on both sides at the top. This provides enough surface area to adhere the deck to as well as stiffen the sheer (the sheer is where the hull and deck come together) I have this started but no pictures as of yet.

After that I will either get the second hull up to the same point as this hull or start the deck...don't know yet.

Monday, July 30, 2007

Well this isn't an update on my boat but my friends, who have been helping me with mine, have just finished their boat and tested it last Sunday (07-22). Here are some photos of it from the chase boat.....pontoon boat...which could not keep up with the cat even in light winds. I can't wait to get mine done!


Thursday, June 21, 2007

Well.....its been a while. Apparently it was August 23 of last year since I last updated this blog. And truthfully, not a much has been done since then. I took the time to do some work on the house and the yard. But now that it is summer again I have been working on it a bit, enough anyway to post another update.


The last post said I was going to pull the first hull off the mold and set it in the holding jig and that I would update it then....that didn't happen. So the first three images are of the first hull off the mold and in the jig.

The remaining images are the start to the internal structure of the boat. There are only a few components to that structure. There are two bulkhead, a transom board, and the substructure.


The two bulkheads are vertical "walls" and run the beam (width) of the hulls, placed where the two cross beams will mount. The cross beams are what connect the two hulls together and support the trampoline in between the hulls. The bulkheads are [currently] made of two 3mm thick pieces of ply-wood (okume) laminated over a 1/2 inch closed cell foam core. This make a thick, light weight, and very strong capable of supporting the stresses of sailing.


The transom is what will close off the back of each hull and is what the all important rudder will be mounted to. This is simply two 1/4 inch pieces of ply-wood laminated together. I do not have the actual bulkheads or transom boards cut yet, but what I did do is cut patterns for them so I can cut parts for both hulls as I need them. Looking through my photos I don't think I have images of these patterns...I will need to get some and edit this post later.


The substructure is the third component to the internal structure of the hulls. This [in the photos] is what the pink insulation foam is for. The series of photos are showing how I patterned the necessary shape for the foam and how I cut the foam. The substructure is place horizontally about eight inches down from the top of each hull. There are two substructures one in front of the forward bulkhead and one in between the two bulkheads. The forward substructure is to keep the hull from collapsing when pitch poling. This is when the boats flips end over end. The aft substructure is to keep the hull side from collapsing when I am hiking out while flying a hull....meaning one hull is out of the water and I'm [literally] standing on the side of the boat balancing it. Oooohhhh I can't wait!

So...thats about it for now. The next step is to finish fairing the second hull, glass the inside of the first hull and the outside of the second hull. Then I can start setting these structural components. I do need to build at least one dagger board....similar to a keel, but removable and no counter balance weight. I'll get into that when I do build it.

Until then....


Wednesday, August 23, 2006


So it’s been a while since my last post. Well a lot has happened. In the last post I had started planeing and faring the hull getting it ready to fiberglass. This took a lot longer then I thought it was going to as, once again, I really didn't know if I was doing it right. Well, I did it right, at least for my first time. Fairing the hull (taking out any dips and hollows) involves a lot of sanding, spreading fairing putty (a mixture of epoxy and a special filler), sanding some more and repeating this process several times. I finally got it as good as I was going to and was ready to glass.


And... last Saturday was a good day. My friend John and I (mostly John) fiber glassed the first hull. It took about three hours and went really smooth. To do this we first spread a very thin coat of epoxy to seal the wood then laid the glass on the hull and cut the cloth to the size we needed. The glass cloth is a weave which we needed to lay on a 45 degree angle to the center line of the boat allowing for maximum strength. In doing this we used 3-4 pieces of cloth overlapping by about 1 inch. After the cloth was cut and positioned we rolled back the overlap and began spreading epoxy on the first section. Again this is a very thin coat of epoxy, just enough to wet the cloth and make it stick to the hull. We repeated this process for all the pieces until it was covered.

Since Saturday I have rolled one two more coats of epoxy to eliminate the texture of the cloth and I am now ready to pull the first hull off the mold. Finally! Then I get to repeat the process again for the second hull. Hopefully, since I know how to do it now, it will go a lot quicker.

So... tomorrow I am planning on pulling the hull off and placing it in the holding jig. This is a "table" of sorts with a hole cut in it in the plan view (looking down onto the top of the hull) shape of the hull. This will hold the hull as I glass the inside and lay in all of the internal structure of the hull.

I hope to have pics of the hull coming of Monday.

Wednesday, July 26, 2006

Finally, work on the actual form of the boat has begun!!!!


Since my last post I have covered the mold with plastic preventing it and the hull from becoming permanently attached. Then the side panels were stapled in place. Throughout the entire process staples are used temporarily to hold the panels and strips of wood in place while the glue dries. Then the stem piece was glued in place. This is a 4" wide wedge of wood running from the keel to the sheer (where the deck and the hull come together). this gives the bow some good strength. Once that was in my friend Ian came over and helped me start stripping the hull. This turns out to be a pretty easy job as the strips fall nicely in place. Where they meet at the bow was a bit tough, but not too bad. Though I don't have photos of it I have removed the staples and have started planning the hull to smooth it out. The next few steps in this project is to finish smoothing and fairing (making sure there are no hollows or humps) the hull, wrap it with a layer of 4 ounce fiberglass, pull it off the mold and set it into the holding jig where I will put in all of the internal structure.